Image Converter
This guide explains how to switch an image to a different format. Sometimes a new format makes the file much smaller with the same quality.
Free plan limits and upgrades
Free users can run up to 15 uploads per day. Each action counts as 1 upload:
- Optimize (MakeTiny)
- Convert
- Resize
Need more? Create an account and upgrade anytime:
- Register: Create a free account
- Compare plans: Pricing
Why convert formats?
- WebP or AVIF can be much smaller than JPG/PNG for the same look.
- PNG is ideal for graphics with transparency and crisp edges.
- JPG can be good for photos when you need compatibility.
Quick tour of the screen
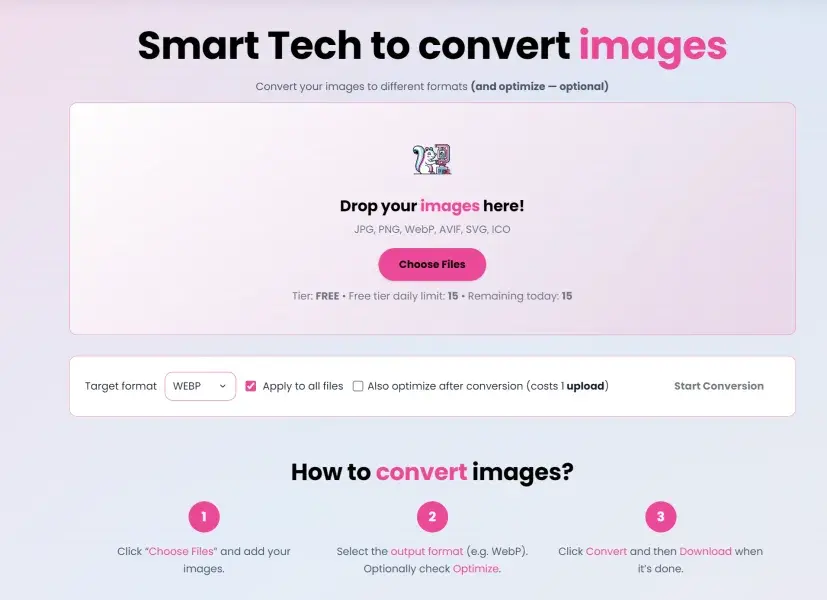 Converter with upload area, format dropdown, and convert button.
- Upload area: drop images or click to select.
- Format: choose WebP, AVIF, JPG, or PNG.
- Convert: processes your image(s) to the chosen format.
Step-by-step: Convert an image
- Open: Image Converter
- Add an image (or a few!).
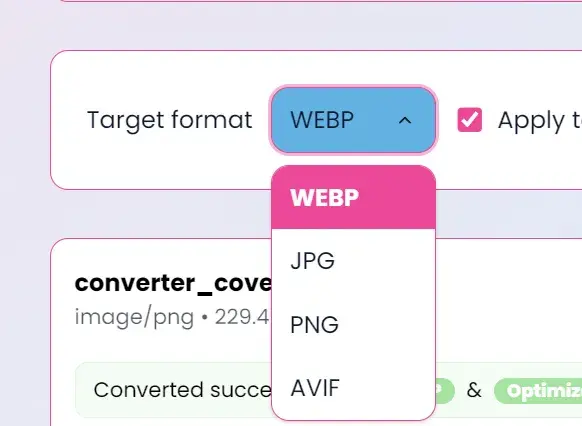
- Pick your target format:
- WebP — best general-purpose for the web.
- AVIF — even smaller sometimes, but slightly slower to encode.
- PNG — great for logos/graphics with transparency.
- JPG — classic photo format.
- Click Convert, then Download.
 Choose the best format for your use case.
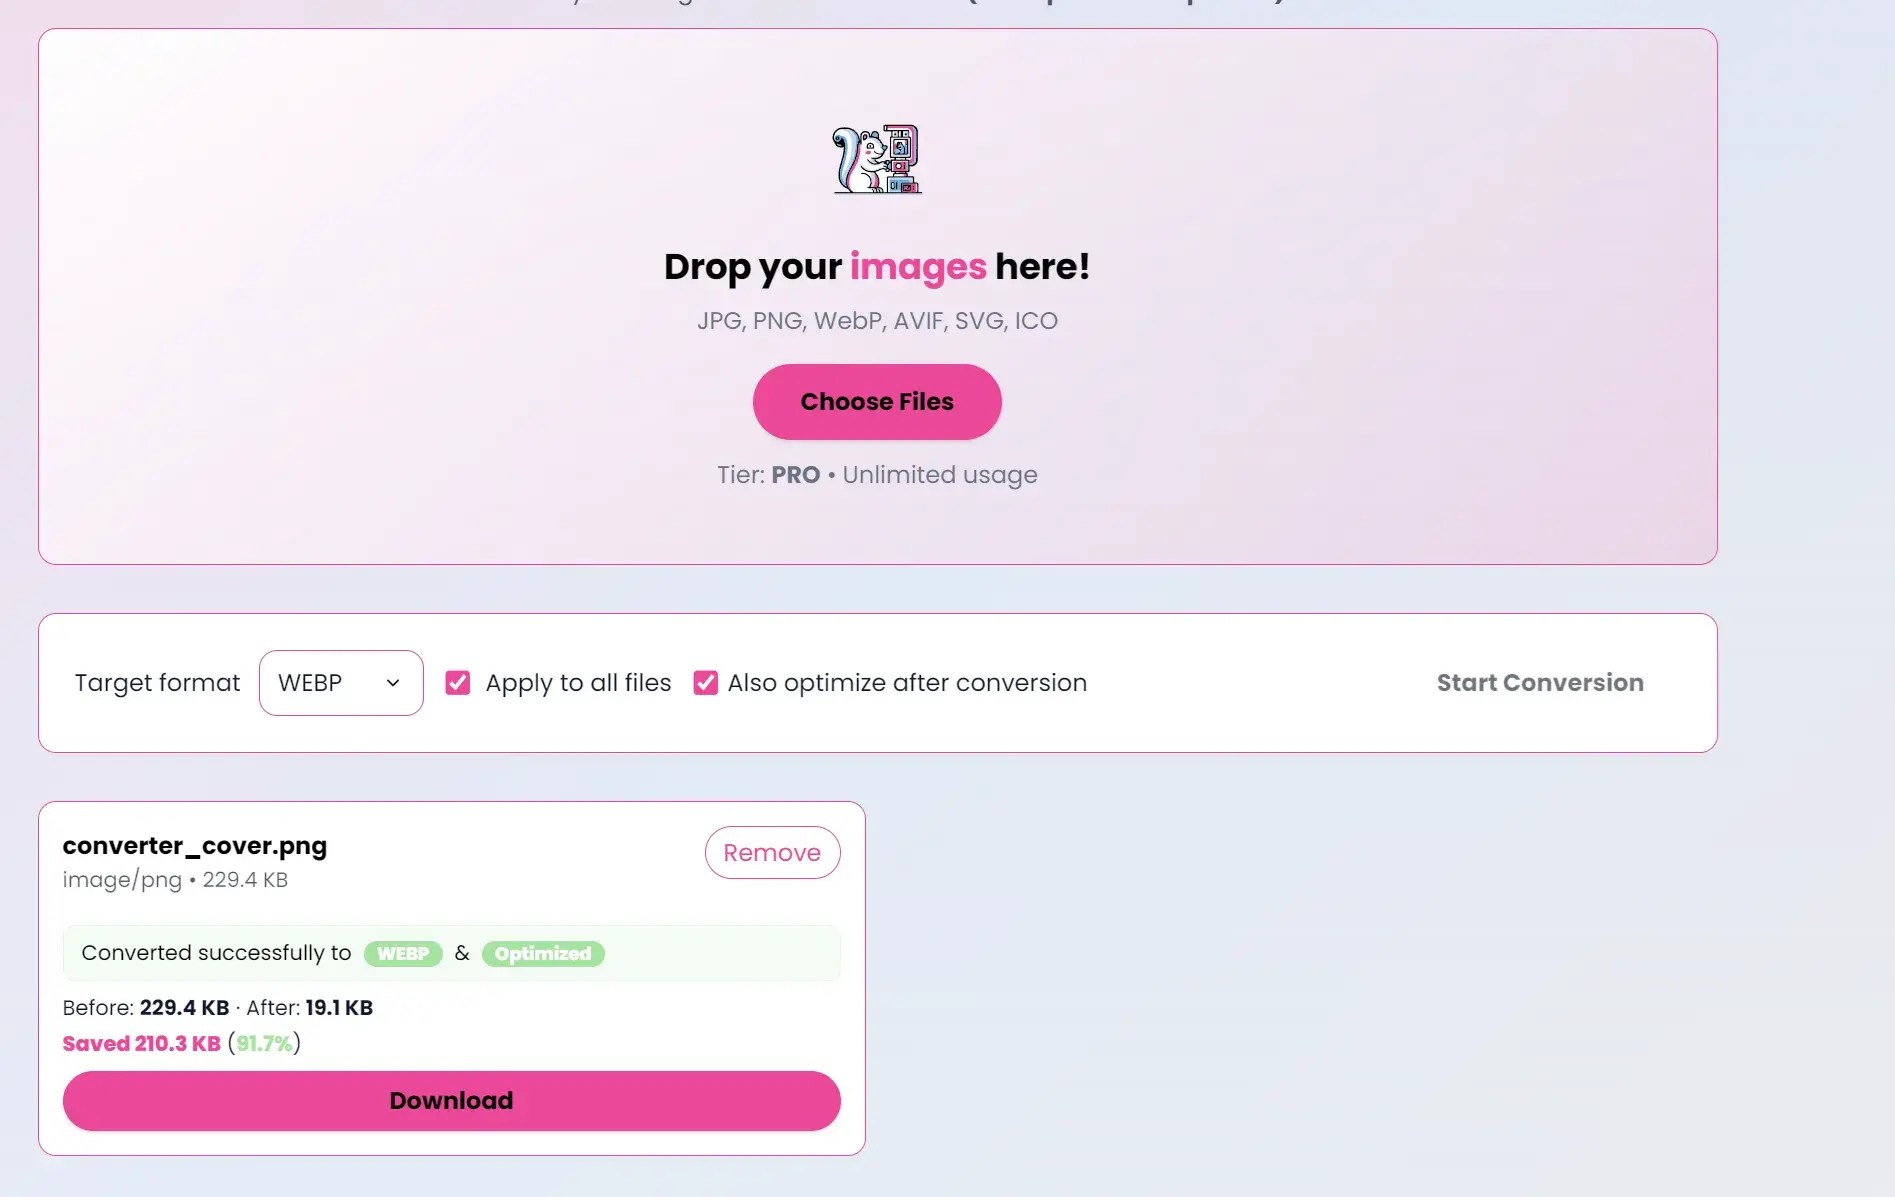 Conversion complete — download your new file.
Tips
- For photos, try WebP first. Compare the size and look.
- For logos/graphics, use PNG or WebP with transparency.
- If a site or tool doesn’t support WebP/AVIF, try JPG/PNG.
Troubleshooting
- “Unsupported format”: Make sure your input is PNG, JPG, WebP, AVIF, or SVG.
- “Too big”: Try resizing first, or upgrade for higher limits.
See also
- Make it smaller too: MakeTiny
- Resize to exact dimensions: Image Resizer
Convert and then optimize (MakeTiny)
You can combine the tools for the best results:
- Use Image Converter to switch the format (for example, PNG → WebP).
- Then open MakeTiny to compress the new file(s) even further without noticeable quality loss.
Why this helps:
- Converting to a modern format (WebP/AVIF) often shrinks files a lot.
- Optimizing afterwards squeezes out extra bytes while keeping it looking great.
Where to start:
- Convert: Image Converter
- Optimize: MakeTiny
Note: The converter uses automatic, safe defaults for output quality per format. There’s no quality slider — the goal is simplicity and consistently good results.